


Wooden Carport
DO IT YOURSELF
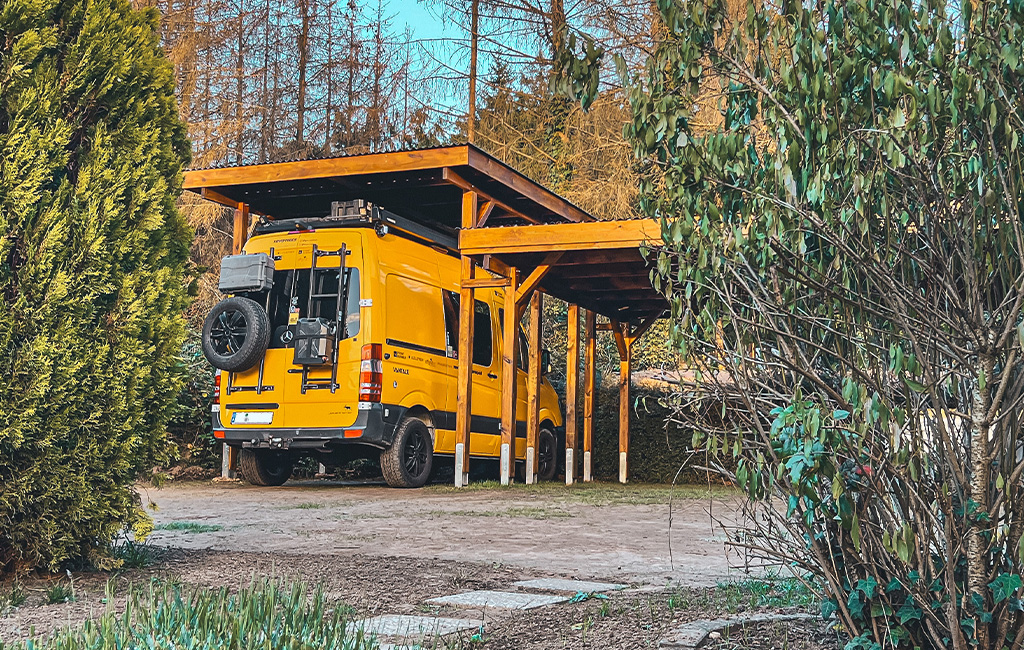
To ensure that the car, campervan or trailer is protected from the wind and weather, Igor from @igor.explores needed a carport. As a DIY expert, he naturally decided to build the carport himself – and the result is certainly impressive! In this guide, he explains step by step how he built this practical and stylish carport. So grab your tools and let’s get started!
In this post, we’ll show you how to quickly and easily build your own practical wooden carport.
Tools & Materials
Tools
- Paint/Mortar Mixer
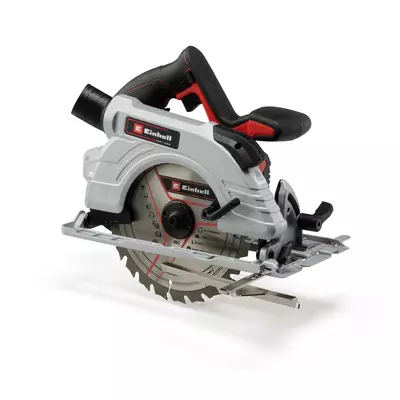
- Hand-held Circular Saw with Guide Rail
- Cordless Drill Driver
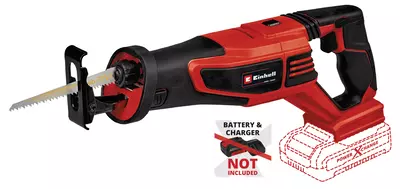
- Cordless Reciprocating Saw
- Set Square & Pencil
- Mason’s Line or Cross Line Laser
- Set of Wood Drill Bits
- Set of Open-End Spanners
- Safety Glasses, Ear Protection & Ladder
- Wood Stain Brush
- Hammer
- Torx Bit Set
- Spirit Level
- Trowel & Shovel
Materials
- 6 Posts 115 x 115 x 3000 mm
- 2 Ridge Beams 45 x 180/150 x 2560 mm
- 2 Ridge Beams 45 x 150/120 x 2530 mm
- 7 Rafters 50 x 135 x 3360 mm
- 4 Angle Braces, 45° chamfered on one side
- 4 Side Fascias 20 x 195 x 2540 mm
- 1 Front Fascia 20 x 195 x 3400 mm
- 1 Rear Fascia (optional) 20 x 195 x 3400 mm
- 8 PVC Roof Panels 1030 x 2600 mm
- 6 Coach Bolts incl. Washers & Nuts M12 x 140 mm
- 12 Coach Bolts incl. Washers & Nuts M10 x 140 mm
- 22 Brackets 60 x 60 x 40 mm
- Countersunk Screws 6 x 90 mm
- Countersunk Screws 4.5 x 50 mm
- Pan Head Screws 4 x 30 mm & 4.5 x 45 mm
- 100 Spacers 76/18 mm
- 100 Stainless Steel Screws incl. Sealing Washers 4 x 50 mm
- 6 H-Post Anchors for 115 x 115 mm posts
- 12 Bags of Quick-Set Cement
- 5 L Wood Stain
Building the Carport
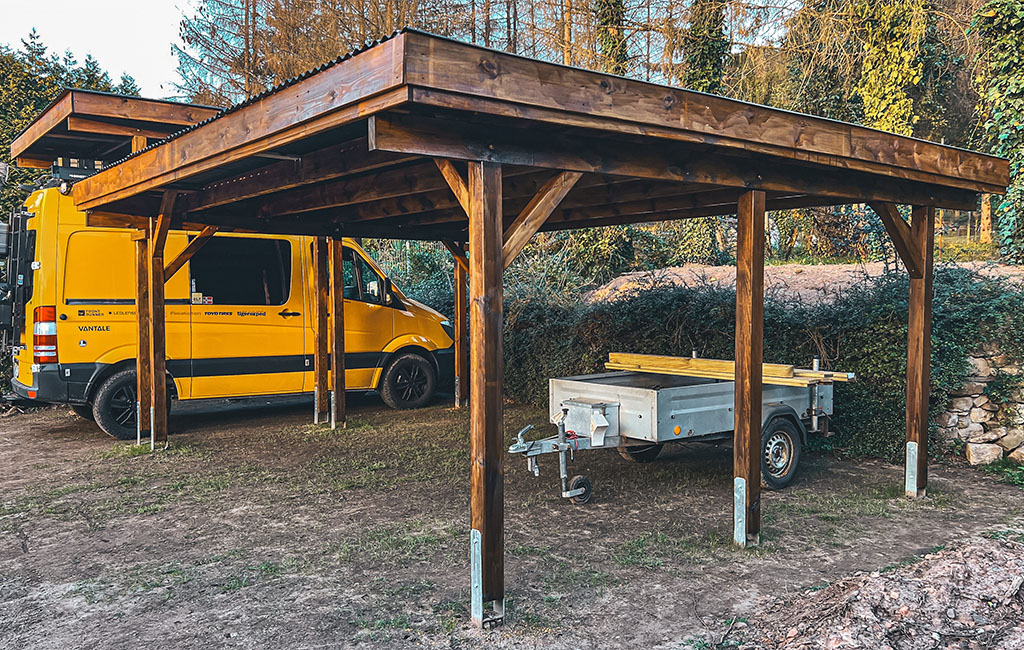
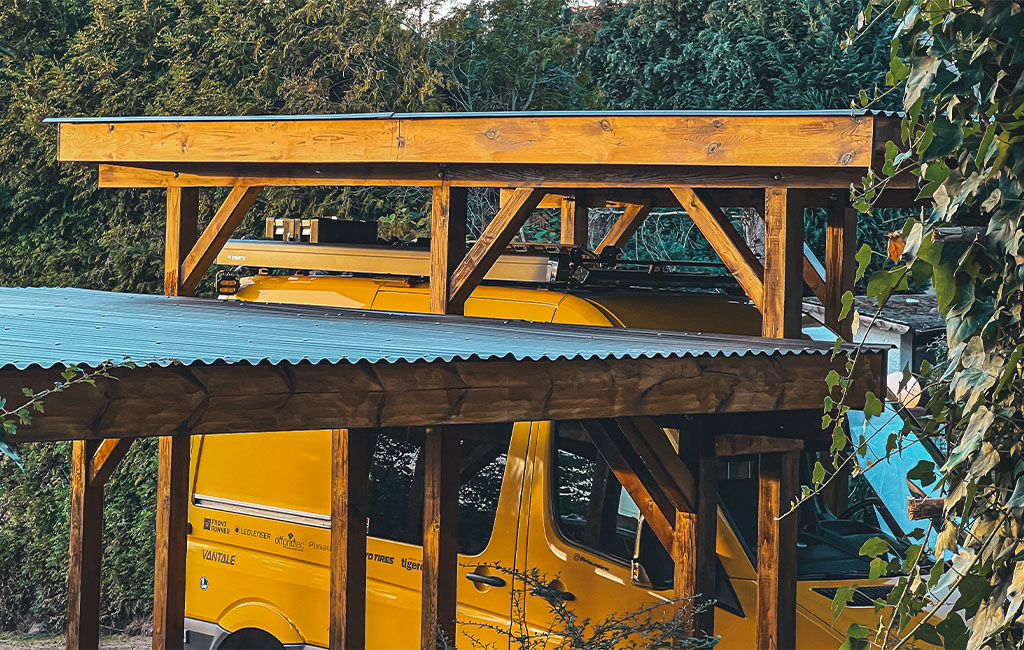
While looking for a suitable way to protect our campervan from the wind and weather, we searched the internet for various options. It needed to be reasonably priced and not too technically demanding, but at the same time it had to have enough clearance height to allow the campervan to drive in. In the end, we opted for a wooden carport with a PVC roof. There are ready-made kits available to buy, but of course, you can also build it yourself.
Step 1: Preparations
Before getting to work, you’ll need to consider what dimensions your carport should have. Ours measures 3 x 3.4 x 5.1 metres. Of course, the dimensions can be adjusted flexibly to suit your preferences and the size of your van or car. It’s also essential to choose a suitable location for the carport and the vehicle. Both the weight of the vehicle and the condition of the ground are extremely important in order to avoid long-term damage.
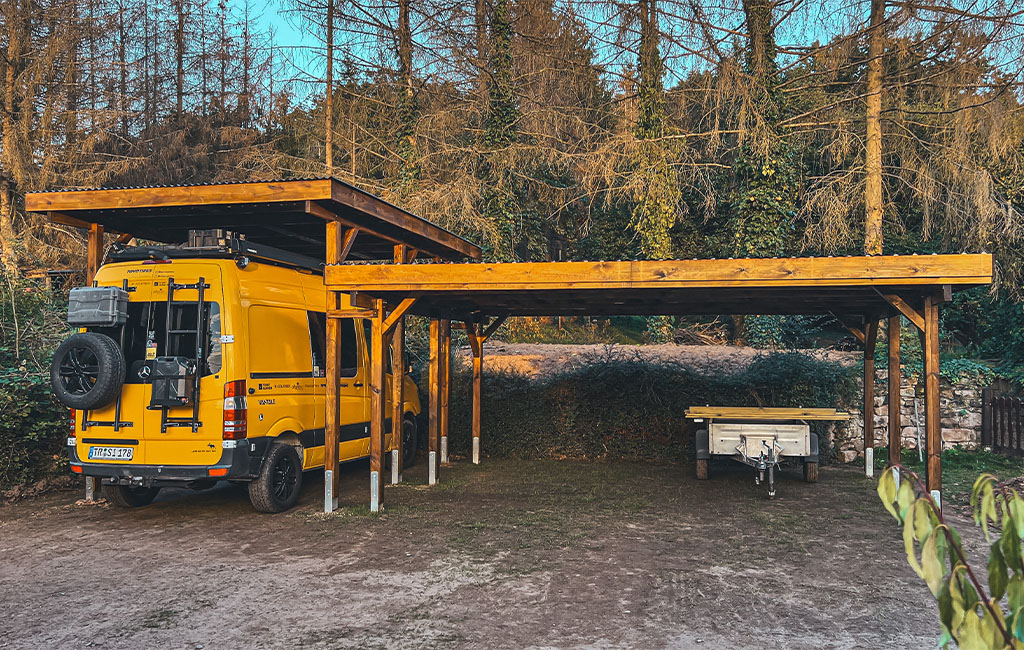
In our case, we had a construction company remove 25 cm of topsoil, reused 28 tonnes of soil, compacted the underlying layer, installed drainage pipes and filled the area with 60 tonnes of grass gravel. Finally, the gravel was compacted five times to create a load-bearing layer for three vehicles. In addition to the campervan, there’s enough space to park two cars. Grass gravel is ideal as a load-bearing layer here, as it gradually becomes overgrown with grass again, providing a green surface with natural drainage.

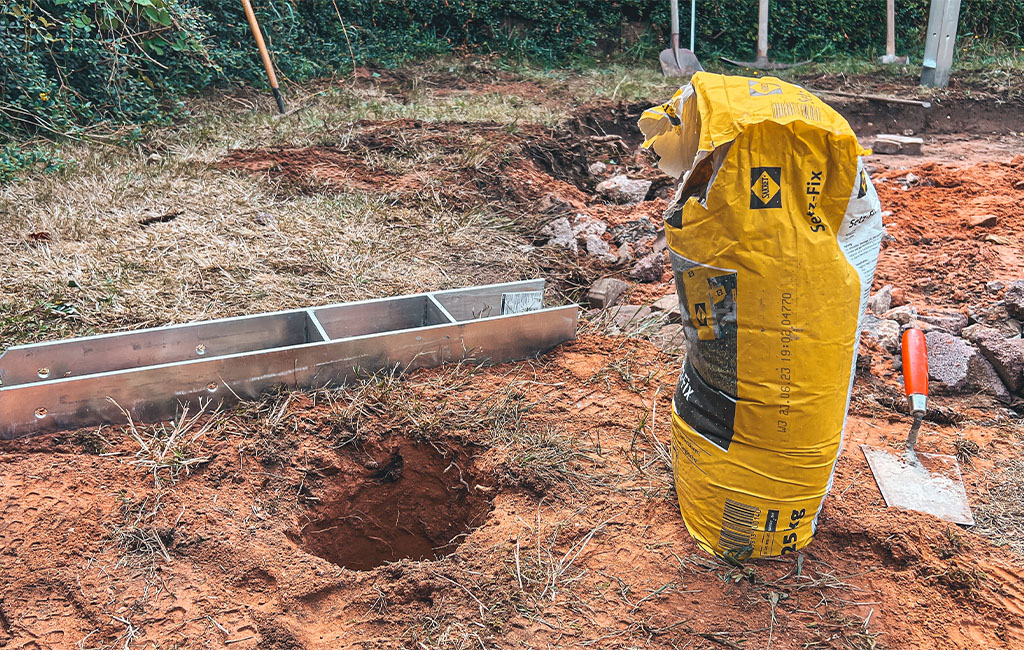
Step 2: Base Area & Post Anchors
Once the area has been prepared, you can mark out the base area of the carport:
- short side: 3.4 m
- long side: 5.1 m
You can use either a mason’s line or a cross line laser for this. The laser has the advantage of showing everything at a precise angle. To create a right angle using the string, you’ll need to form a triangle:
- Leg 1: 3 m
- Leg 2: 4 m
- Diagonal: 5 m
The first post anchor is placed in the corner of the right angle. This will become either the front or rear corner post. At this stage, you should already roughly align the carport on the construction site. Making corrections later on will be very difficult, if not impossible.
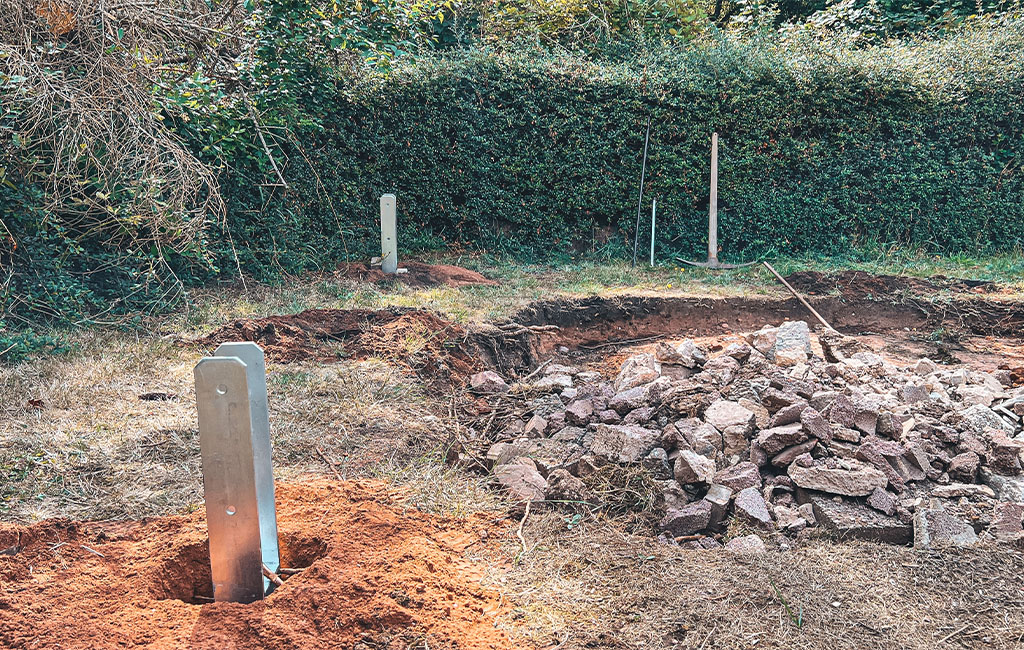
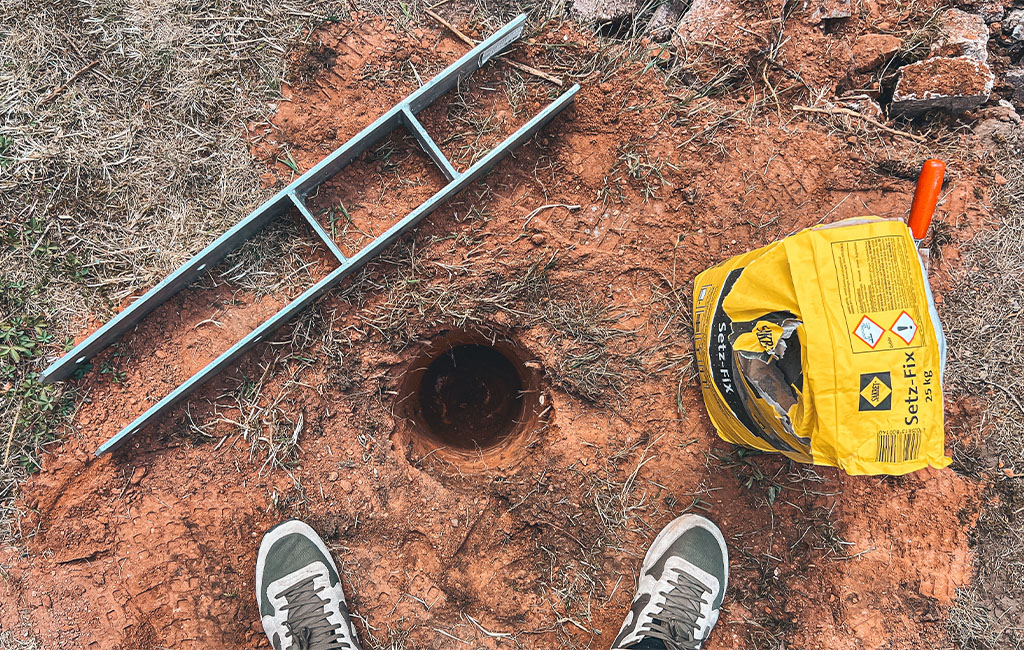
The hole for the post anchor should be at least 35 cm deep and have a diameter of 25–30 cm. We calculated two bags (25 kg each) of quick-set cement per anchor hole. The H-anchor is positioned so that there is approximately 4 cm of space between the top bar and the cement. The two legs with pre-drilled holes should point upwards towards the beam. The anchor must sit perfectly level and be checked and aligned in every direction.
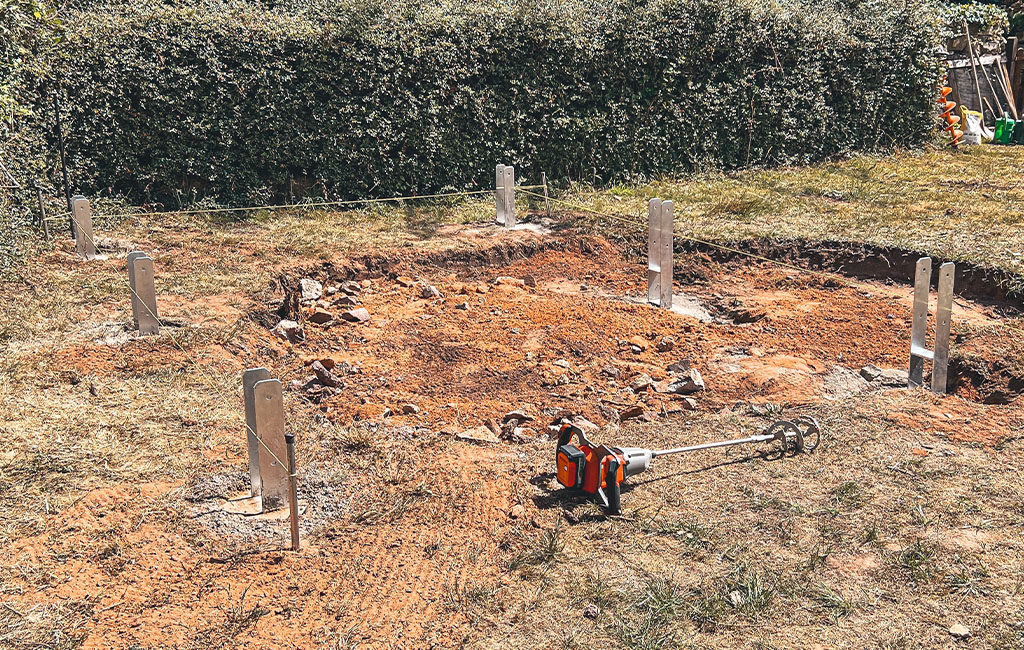
After a short setting time (around 30 minutes), we align the remaining anchors with the one previously positioned. For this, we once again use the string or the cross line laser. To ensure all anchors are at the same height, we transfer the level from the set anchor using a straightedge (aluminium or wooden). H-anchor positioning measurements (centre to centre):
- short side: 2.8 m
- long side: 1.91 m
The setting, working and drying times can be found in the cement instructions. In our case, it was 24 hours with quick-set cement.
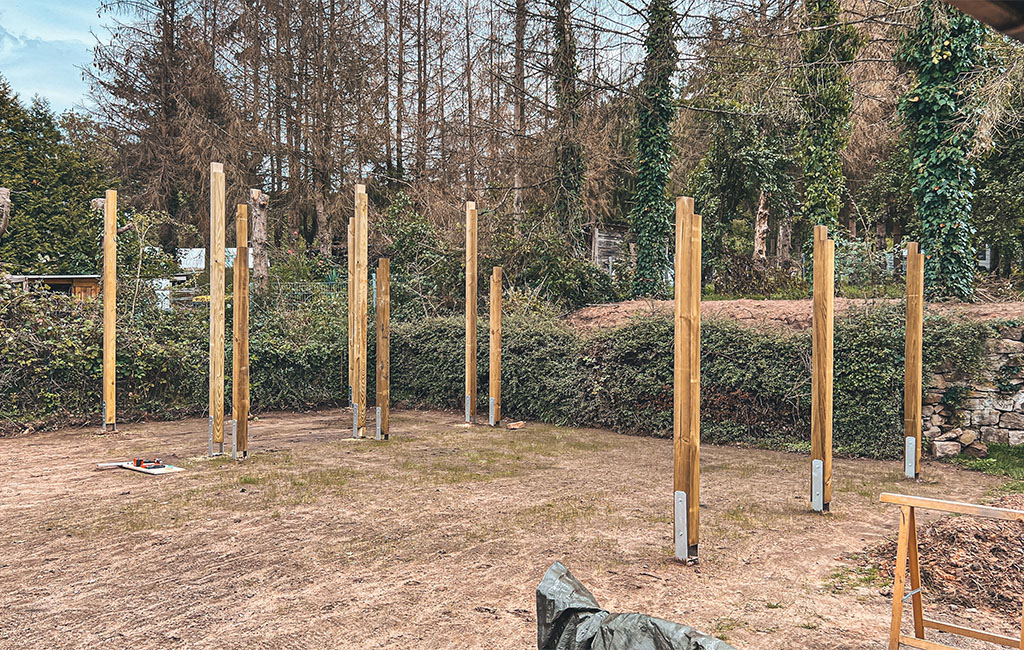
Step 3: Installing the Beams
Next, all six beams are notched: 60 mm deep and 110 mm high. You can use a cordless circular saw with a suitable guide rail for this, and then a reciprocating saw for the second cut.
Next, you can place the beams into the H-anchors (with the chamfered side facing outwards), align them so they are level, drill through the pre-drilled holes of the H-anchors using a 10 mm drill bit, and secure them with M10 x 140 coach bolts including washers.
- Tip: Place a spacer block under each beam to ensure uniform measurements and consistent height.
Step 4: Ridge Beams
The ridge beams are installed in two sections. To ensure that rainwater runs off the roof properly, these need to be cut at an angle towards the rear.
Cutting dimensions:
- 2x front ridge beams: 180 mm tapering to 150 mm in the middle (length 2560 mm)
- 2x middle-to-rear ridge beams: 150 mm tapering to 120 mm at the rear (length 2530 mm)
You can now grab the cordless circular saw again, adjust it accordingly and use a double guide rail length.
- Ridge beam overhang beyond the front posts: 568 mm
- Ridge beam overhang beyond the rear posts: 537 mm
The ridge beams are placed into the notched section of the posts with the wide side facing forwards, aligned properly, and drilled through the centre of the post using a 12 mm drill bit. They are then secured with M12 x 140 bolts, including washers and nuts.
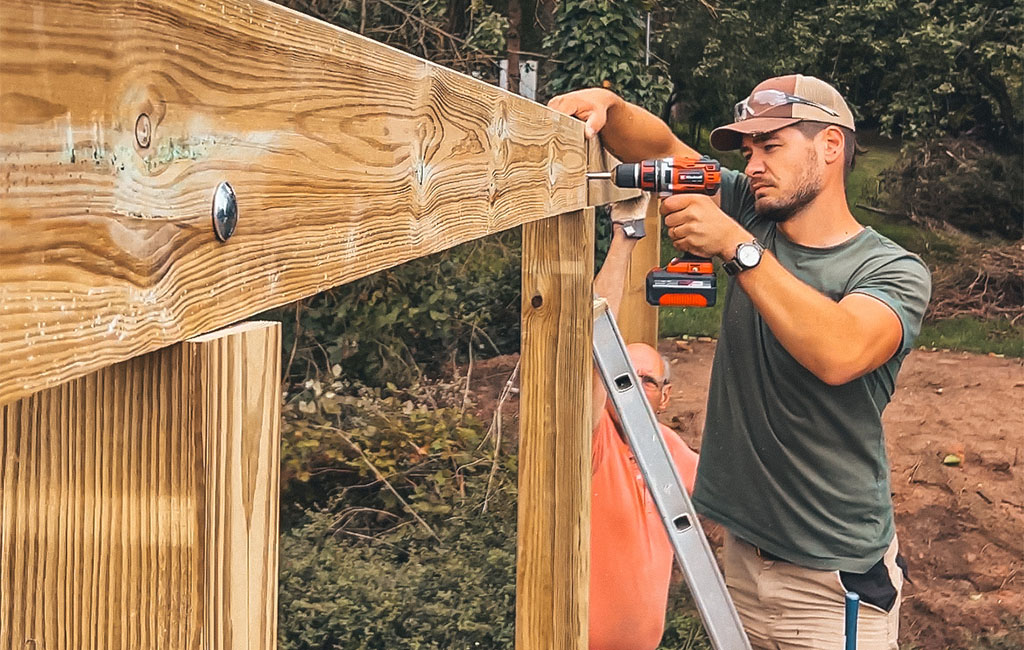
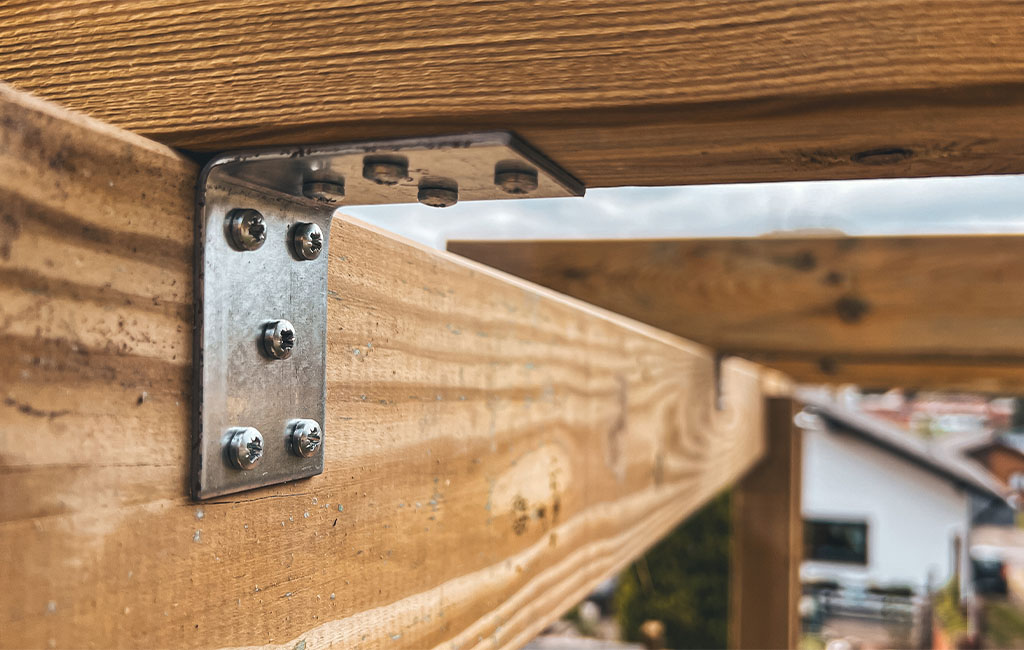
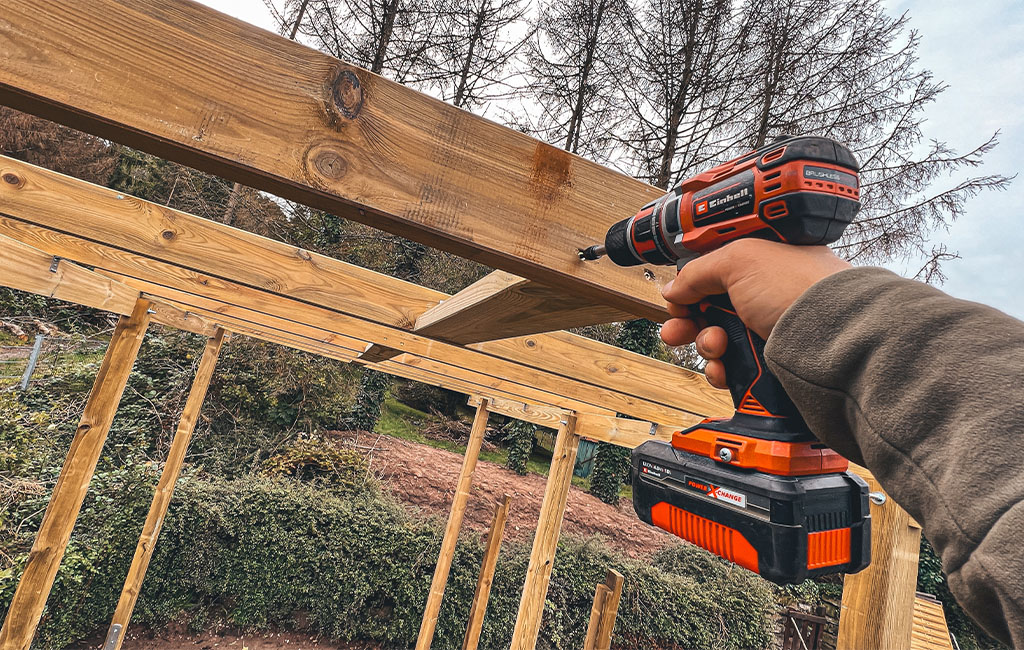
Step 5: Rafters
The rafters are placed upright on top of the ridge beams. The overhang of all rafters on the left and right beyond the ridge beams is 210 mm. The first and last rafter sit flush with the ridge beam at both the wide and narrow ends.
The rafters are aligned with an edge-to-edge spacing of 783 mm and fixed to the ridge beam using brackets. Use the pan head screws 4.5 x 45 mm and fill all bracket holes. The brackets are screwed to the lower edge and on the inside (see image).
For better stabilisation and reinforcement, a connecting beam or planks can be screwed in between the rafters in the middle.
Step 6: Angle Braces
Next, the angle braces are added. The angle braces provide additional stability and reinforce the structure. To create a strong connection, these are also chamfered on one side:
- Depth: 55 mm
- Width: 45 mm
- Full length
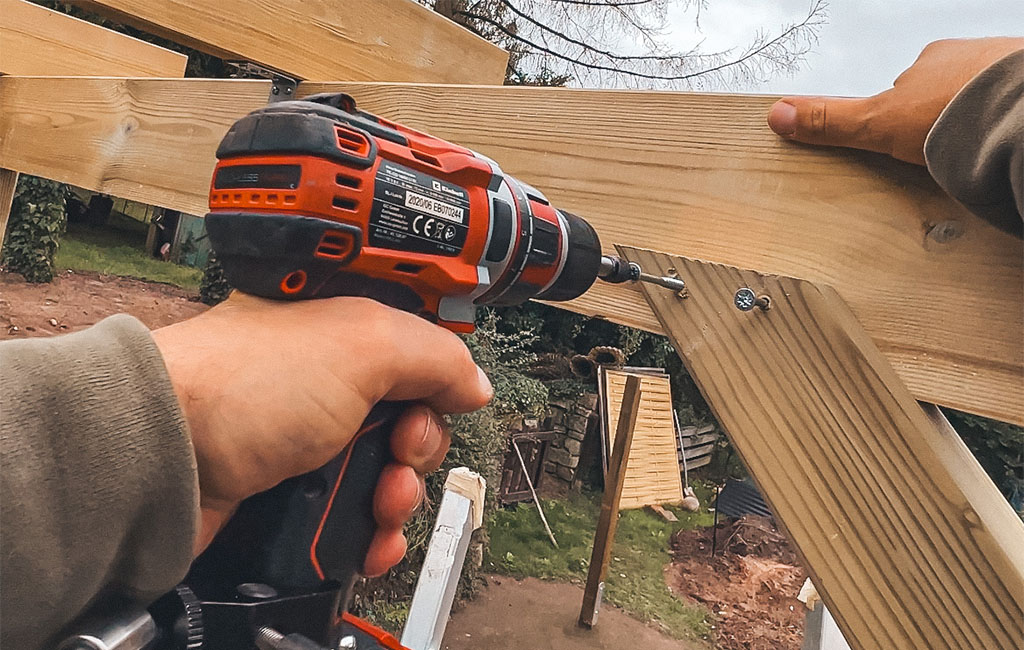
A cordless circular saw works best for this as well. Afterwards, pre-drill holes using a 5 mm drill bit so you can secure the braces with 6 x 90 mm screws. You should use at least four screws per brace.
Step 7: Fascia
The fascia surrounds the carport on three sides and covers the end grain of the rafters. The side fascia boards are made in two sections and are installed first. The boards meet in the middle of the central rafter and are aligned flush at both the front and rear. For fixing, we use 4.5 x 50 mm countersunk screws.
Next, you need to screw the front fascia board in place. The rear section remains open.

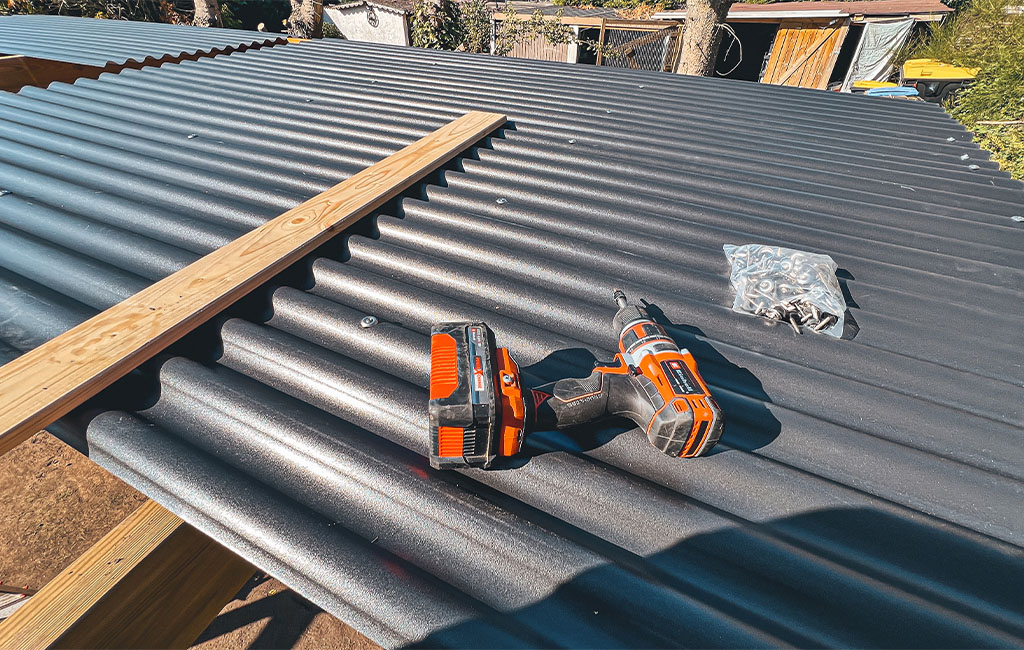
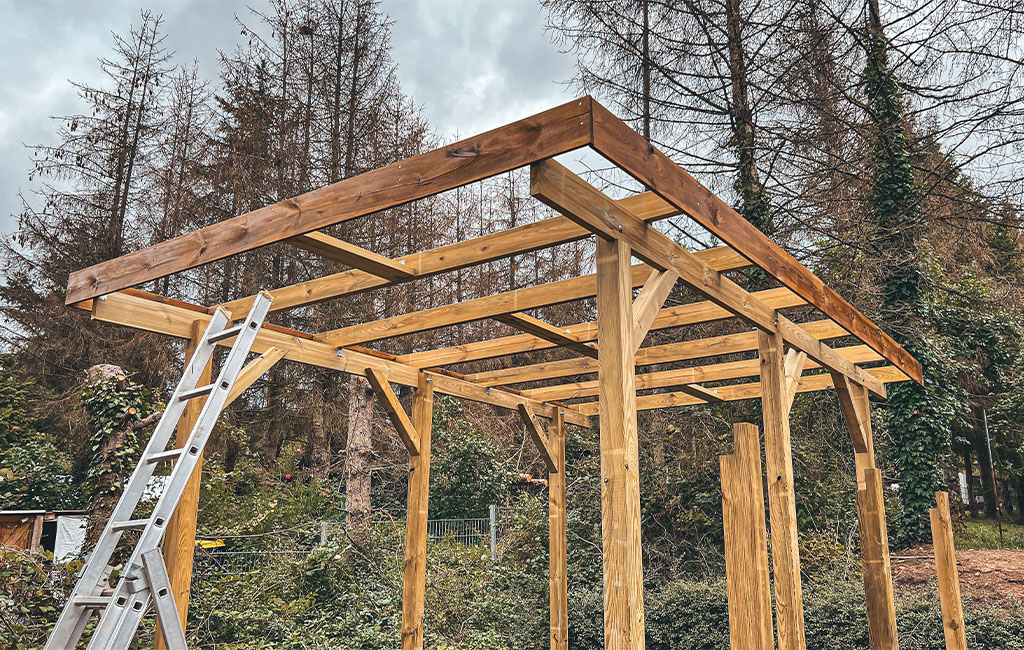
Step 8: Roofing
The roof consists of PVC roof panels and is installed from back to front. There should be at least two rows overlapping lengthwise and a minimum overlap of 80 mm in width.
For quick and secure installation, use plastic spacers sized 76/18 and stainless steel screws with sealing washers, 4 x 50 mm.
The PVC panels are aligned in the rear corner so that there is a rear overhang of at least around 50 mm. This is important to create a proper drip edge for the later installation of a gutter. Along the length, an overhang of at least around 40 mm is sufficient. A spacer is fitted and screwed in place every 3–4 corrugations. The screws are driven into the rafters and the surrounding fascia. At the front, an overhang of around 30 mm is sufficient.
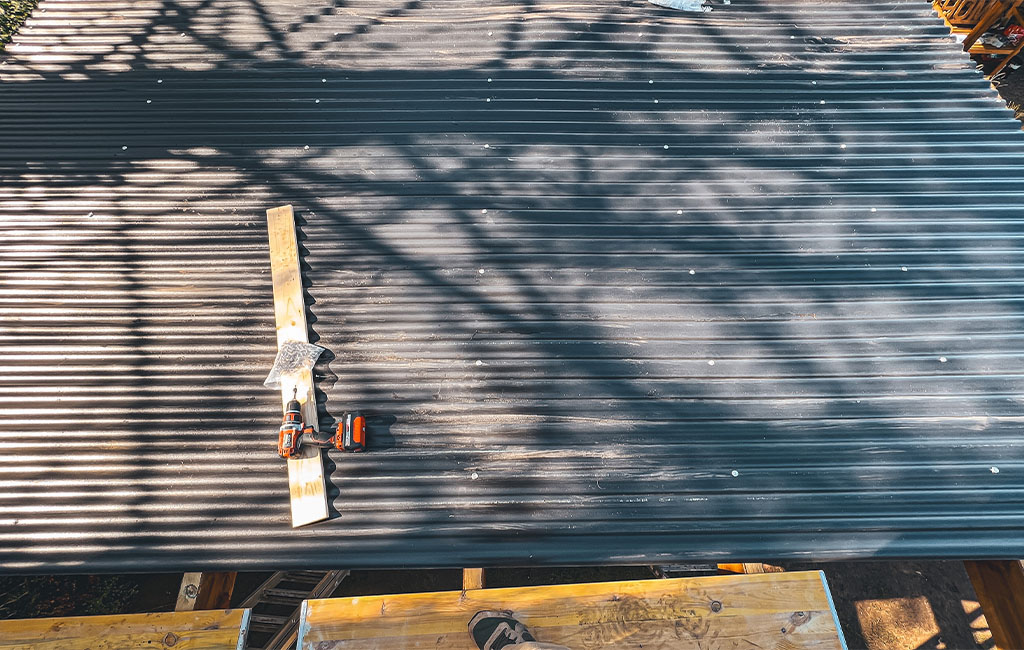
- Tip: Use a straightedge to help you screw straight through the PVC panel into the rafters.

Once the roof is in place, we recommend protecting the wood against the elements – for example, with a wood stain. We opted for pressure-treated timber as a base and additionally applied a thick-layer stain in a walnut finish.
Step 9: Completion
The ridge beams are installed in two sections. After the stain has dried, you can also add a gutter or fit fence panels in the gaps between the posts. Installing a gutter is definitely worthwhile, as the roof surface collects a fair amount of water. In our case, we also built a double carport next to the campervan carport at the same time, which now allows us to park two cars alongside.
Have fun building your own!

Tools Used
Here you’ll find the Einhell tools that were used during the build.

Product was added to the comparison list.
Product was removed from the comparison list.
Open comparison listIn this article you will learn all about:

Published on 05.09.2023
“Escape the everyday, dive into adventure” – that’s Igor Bukovsky, aka @igor.explores. A passionate content creator and van life enthusiast, he shares his love for DIY projects, outdoor experiences, and life on the road. Whether it’s van conversions, camping gear, or tips for life on the move – Igor tests, tinkers, and documents it all with genuine dedication. He shares his insights and inspiration on Instagram and other platforms with a steadily growing community.